The question “how much does it cost to build a home recording studio” has a frustratingly wide answer range - anywhere from $500 to $20,000 or more. The actual cost depends on your goals, your room, and whether you are recording vocals for a podcast, producing full band recordings, or mixing and mastering professional tracks destined for streaming platforms.
The good news is that 2026 is arguably the best time in history to build a home recording studio. Advances in affordable audio technology mean that a $1,000 setup today delivers sound quality that would have required $10,000 or more just 15 years ago. Professional-grade audio interfaces, condenser microphones, and digital audio workstations (DAWs) have dropped in price while increasing in quality, closing the gap between home studios and commercial facilities. Focusrite’s fourth-generation Scarlett interfaces deliver converter quality that was unheard of at their price point even five years ago, and free DAWs like BandLab and Audacity continue to gain features that rival paid software.
This guide breaks down the cost of building a home recording studio at three distinct budget levels - budget ($500 to $1,000), mid-range ($1,000 to $5,000), and professional ($5,000 to $20,000) - with specific 2026 product recommendations and current pricing. Whether you are a songwriter recording demos, a podcaster building a dedicated space, or a producer working on release-quality tracks, you will find your tier and know exactly where to invest your money.
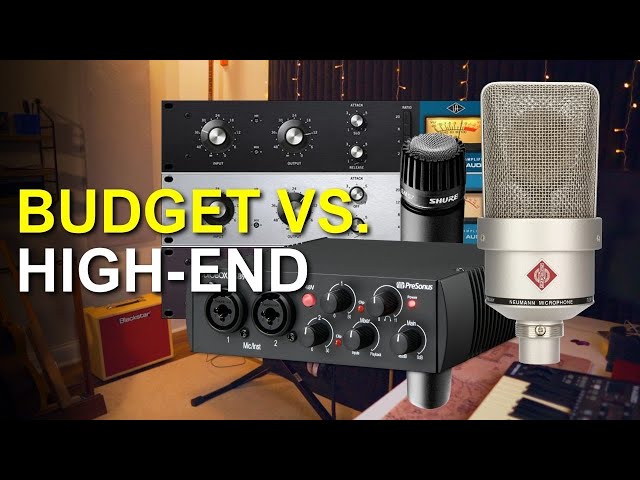
Image: YouTube
Budget Tier: $500 to $1,000
A $500 to $1,000 investment builds a capable home recording studio that can produce surprisingly good results for vocals, acoustic instruments, podcasting, and basic music production. At this level, you are prioritizing the essentials and being strategic about where every dollar goes.
What $500 to $1,000 buys you:
Audio interface: Focusrite Scarlett Solo 4th Gen ($130) or Focusrite Scarlett 2i2 4th Gen ($180). These remain the industry-standard entry-level interfaces in 2026, featuring improved fourth-generation preamps, USB-C connectivity, and Dynamic Gain Halos that help you set optimal recording levels visually. The 2i2 adds a second input for recording two sources simultaneously - essential if you plan to record vocals and guitar at the same time.
Microphone: Audio-Technica AT2020 ($119) for a condenser or Shure SM58 ($99) for a dynamic. The AT2020 continues to be the go-to budget condenser for vocals and acoustic instruments with its clean, detailed sound profile. The SM58 is indestructible, sounds great on vocals, and requires no phantom power - making it a safer choice for untreated rooms where a condenser would pick up too much room noise.
Headphones: Audio-Technica ATH-M50x ($149). These closed-back headphones remain the most recommended studio headphones under $200 in 2026. They deliver accurate sound reproduction, stay comfortable during long sessions, and have a durable build quality that survives years of daily use. If budget is tight, the Audio-Technica ATH-M20x at around $50 is a surprisingly capable alternative.
Microphone stand and accessories: A boom arm or floor stand ($25 to $50), pop filter ($10 to $20), XLR cable ($10 to $15). Buy cables from reliable brands like Hosa or Mogami to avoid introducing noise into your signal chain.
DAW software: GarageBand (free on Mac), BandLab (free on all platforms with cloud storage), or Reaper ($60 personal license). More on DAW options in the software section below.
Basic acoustic treatment: Moving blankets hung on walls ($30 to $60) or a reflection filter placed behind the microphone ($40 to $80). Not ideal, but functional at this budget and noticeably better than a completely bare room.
Total: approximately $500 to $750 for a minimal but functional setup.
At this budget, you are making trade-offs. You will be mixing on headphones rather than studio monitors, your acoustic treatment is minimal, and your microphone options are limited to one. But this setup can produce clean, professional-sounding vocal recordings, solid podcast audio, and perfectly usable demo tracks. Many successful independent artists started with setups in this range and upgraded gradually as their skills and income grew.
Mid-Range Tier: $1,000 to $5,000
The $1,000 to $5,000 range is where home studios start to rival lower-end commercial facilities in recording quality. This budget allows you to address the weaknesses of a budget setup - proper monitoring, better acoustic treatment, and more versatile microphone options.
What $1,000 to $5,000 buys you:
Audio interface: Universal Audio Volt 276 ($300) with built-in vintage compressor emulation inspired by the legendary 1176, or Audient iD14 MkII ($300) with class-leading preamp quality that rivals interfaces costing twice as much. The MOTU M2 ($200) is another excellent choice in 2026, featuring ESS Sabre32 Ultra DAC technology delivering 120dB of dynamic range and a full-color LCD screen for real-time metering. All three represent significant upgrades from entry-level interfaces.
Microphones: Rode NT1 5th Generation ($249) - one of the quietest condenser microphones available, featuring both XLR and USB-C outputs so it works with or without an audio interface. Add a Shure SM57 ($99) for instruments and guitar amps - it has been the workhorse of recording studios since 1965. Budget allowing, add a pair of small-diaphragm condensers like the Rode M5 Matched Pair ($199) for stereo recording of acoustic sources.
Studio monitors: Yamaha HS5 ($200 each, $400 pair) or Adam Audio T5V ($220 each). Proper studio monitors in a treated room give you accurate sound reproduction that headphones cannot fully replicate. The Yamaha HS series is legendary for flat, honest sound that reveals exactly what your mix contains - no flattering bass boosts or hyped highs to mislead your decisions.
Headphones: Keep the ATH-M50x for tracking, and add an open-back pair like the Beyerdynamic DT 990 Pro ($179) or Sennheiser HD 600 ($400) for mixing reference. Open-back headphones provide a more natural, speaker-like soundstage that helps you make mix decisions that translate to real-world playback systems.
Acoustic treatment: A proper set of acoustic panels - 8 to 12 panels from brands like ATS Acoustics ($35 to $60 per panel) or GIK Acoustics ($99 to $129 per panel for their Amplitude series) covering first reflection points, corners, and behind the monitoring position. Budget $400 to $800 for meaningful treatment that transforms your room from a liability into an asset.
MIDI controller: Akai MPK Mini MK3 ($99) or Arturia KeyLab Essential 49 ($229) for playing virtual instruments and controlling your DAW. If you produce any electronic music or use virtual instruments, a MIDI controller is essentially mandatory for creative workflow.
DAW software: Logic Pro ($200 one-time - Mac only, exceptional value with a massive instrument and loop library), Ableton Live Standard ($349), or FL Studio Producer ($199 with free lifetime updates). These professional DAWs include extensive virtual instrument libraries and effects plugins that can replace thousands of dollars in outboard gear.
Accessories: Quality cables ($50 to $100 total), microphone stands ($50 to $100), pop filters, isolation pads for monitors ($30 to $50).
Total: approximately $2,000 to $4,500 for a well-rounded mid-range studio.
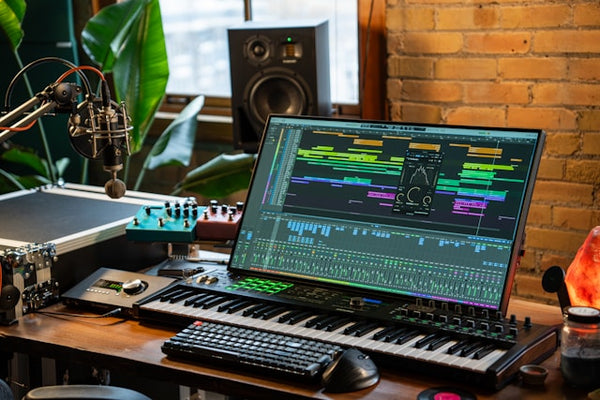
Image: Samplesound
Professional Tier: $5,000 to $20,000
Understanding how much it costs to build a home recording studio at the professional level means understanding that you are building a facility capable of producing fully release-ready music, broadcast-quality podcasts, or professional voice-over work. At $5,000 to $20,000, you can achieve results that compete with commercial studios charging $200 to $500 per hour.
What $5,000 to $20,000 buys you:
Audio interface: Universal Audio Apollo Twin X DUO Gen 2 ($999) or Apollo Twin X QUAD Gen 2 ($1,299) with real-time UAD plugin processing, allowing you to record through high-quality analog-modeled effects with near-zero latency. For more inputs: Universal Audio Apollo x4 ($2,499) or RME Fireface UCX II ($1,799). The RME is legendary for its driver stability and near-zero latency performance - studios that rely on rock-solid reliability often choose RME for this reason alone.
Microphones: Neumann TLM 103 ($1,300) - a genuine world-class vocal microphone used in professional studios globally, featuring the same capsule lineage as Neumann’s flagship U87. Add specialty microphones: Shure SM7dB ($549) for broadcast vocals, podcasting, and rock vocals - this newer version of the classic SM7B includes a built-in preamp that eliminates the need for a separate gain booster like the Cloudlifter. The AKG C414 XLII ($1,099) remains the Swiss Army knife of the microphone world - versatile across every source from vocals to drums to acoustic instruments. For ribbon warmth, the Royer R-121 ($1,395) delivers on guitar amps and as a room microphone.
Studio monitors: Adam Audio A7V ($749 each, $1,498 pair) with their signature ribbon tweeter design for exceptional high-frequency detail, Focal Shape 65 ($599 each, $1,198 pair), or Genelec 8030C ($750 each). These are reference-grade monitors that reveal every detail of your mix - both the brilliance and the flaws.
Acoustic treatment: Professional-grade treatment from GIK Acoustics - $1,500 to $4,000 for a complete room treatment package. GIK’s Amplitude panels start at $99 each, Amplitude Bass Trap panels at $129, and Corner Bass Traps at $209. A comprehensive treatment plan includes broadband absorbers, bass traps, and diffusers designed specifically for your room’s dimensions. At this budget, you might also consider building a vocal booth enclosure ($500 to $2,000 for DIY, $3,000+ for prefab options like the Whisper Room).
Outboard gear (optional but excellent): A quality outboard preamp like the Warm Audio WA-73 ($549) adds hardware character to your recordings that plugins can only approximate. A hardware compressor like the FMR Audio RNC 1773 ($200) or Warm Audio WA-2A ($899) provides analog compression quality with a tactile, immediate workflow that many engineers prefer to mouse-clicking.
Plugin bundles: FabFilter Total Bundle ($1,069) is the gold standard for mixing and mastering plugins in 2026, including Pro-Q 4, Pro-L 2, and Pro-C 3 among 14 professional processors. Universal Audio Spark subscription ($9.99/month) provides access to UAD’s legendary analog-modeled plugins. Soundtoys Effect Rack ($499) adds creative effects that are used on countless hit records.
Furniture: A proper studio desk with rack mounts and monitor positioning ($300 to $1,500) and an ergonomic studio chair ($200 to $500). Your physical comfort directly impacts how long you can work and how good your decisions are during extended mixing sessions.
Advertisement
Total: approximately $7,000 to $15,000 for a professional-grade home studio, with $20,000+ possible when including premium outboard gear and extensive acoustic treatment.
Audio Interfaces at Every Budget
The audio interface is the most critical piece of hardware in determining how much it costs to build a home recording studio that sounds professional. It converts analog audio (from microphones and instruments) to digital data your computer can process, and vice versa. The quality of this conversion directly affects the clarity and fidelity of every recording you make.
Budget ($100 to $200): Focusrite Scarlett Solo 4th Gen ($130), Focusrite Scarlett 2i2 4th Gen ($180), Audient EVO 4 ($130) with its clever auto-gain feature, and PreSonus AudioBox USB 96 ($100). These provide clean, transparent recording quality that is more than adequate for most home studio needs. The fourth-generation Scarlett interfaces in particular have seen meaningful improvements in preamp quality and converter performance over their predecessors.
Mid-range ($200 to $500): Universal Audio Volt 276 ($300), Audient iD14 MkII ($300), MOTU M2 ($200). The MOTU M2 has developed a cult following for its ESS Sabre32 Ultra DAC technology, which delivers 120dB of dynamic range - converter performance that genuinely rivals interfaces costing two to three times as much. Independent measurements consistently rank it among the best-measuring interfaces under $1,000. The Audient iD14 MkII uses the same preamp design found in Audient’s large-format recording consoles, delivering class-leading clarity.
Professional ($500 to $2,500): Universal Audio Apollo Twin X DUO Gen 2 ($999), RME Babyface Pro FS ($900), Antelope Audio Discrete 4 Synergy Core ($1,299). Reference-grade conversion, ultra-low latency, and built-in DSP processing define this tier. The Apollo Twin X remains the most popular professional home studio interface for its combination of conversion quality and UAD plugin ecosystem - you can track through classic compressor and EQ emulations in real time without loading your computer’s CPU.
Microphones: The Heart of Your Studio
Microphones capture the raw audio that everything else processes, making them the most direct influence on recording quality. When evaluating how much it costs to build a home recording studio, allocating appropriately to microphones pays dividends that no amount of post-processing can replicate.
Condenser microphones are the standard for vocals and acoustic instruments. They offer detail, clarity, and sensitivity that captures the nuances of a performance. Budget options: Audio-Technica AT2020 ($119), Rode NT1 5th Generation ($249) with both XLR and USB-C outputs. Professional options: Neumann TLM 103 ($1,300), AKG C414 XLII ($1,099), Neumann U87 AI ($3,600 - the gold standard that has appeared on more hit records than any other microphone in history).
Dynamic microphones are more versatile and forgiving of untreated rooms because they are less sensitive to room reflections. The Shure SM58 ($99) handles vocals, the Shure SM57 ($99) handles virtually any instrument, and the Shure SM7dB ($549) has become the go-to for podcasting, broadcasting, and rock/hip-hop vocals. The SM7dB is the 2024-released successor to the legendary SM7B, adding a built-in active preamp that eliminates the common complaint of insufficient gain. The Electro-Voice RE20 ($449) remains another broadcast standard used on radio stations worldwide.
Ribbon microphones provide a warm, vintage character that digital recording sometimes lacks. The Royer R-121 ($1,395) is the industry standard for guitar amps and is exceptional as a room microphone. Budget ribbon options like the MXL R144 ($99) offer a taste of ribbon character at an entry-level price, though they require careful handling as ribbon elements are more fragile than condenser or dynamic capsules.
Studio Monitors and Headphones
Accurate monitoring is essential for making mixing decisions that translate across all playback systems. This is the area where many home studio builders underinvest, and it directly impacts the quality of their output.
Why you need both monitors and headphones: Monitors give you a sense of how music sounds in a physical space - stereo image, low-end response, and spatial relationships between instruments. Headphones reveal fine detail, help you catch subtle noise and artifacts, and are essential for tracking (recording while listening to playback without bleed into the microphone). Professional mixing uses both, cross-referencing decisions between monitors and headphones to ensure your mix translates to car speakers, earbuds, laptop speakers, and everything in between.
Monitor recommendations: Budget: PreSonus Eris E3.5 ($100 pair) - surprisingly capable for the price and perfect for a starter setup. Mid-range: Yamaha HS5 ($400 pair) or KRK Rokit 5 G4 ($360 pair). Professional: Adam Audio A7V ($1,498 pair) with their signature ribbon tweeter, Focal Shape 65 ($1,198 pair), Genelec 8030C ($1,500 pair). The Adam Audio A7V has emerged as a particularly strong value proposition in 2026, offering reference-grade monitoring with exceptional high-frequency detail at a price point below many competitors.
Headphone recommendations: Closed-back for tracking: Audio-Technica ATH-M50x ($149), Beyerdynamic DT 770 Pro ($159). Open-back for mixing reference: Beyerdynamic DT 990 Pro ($179), Sennheiser HD 600 ($400), Audeze LCD-X ($1,199 - reference-grade planar magnetic headphones that provide an almost speaker-like experience). When budgeting, prioritize getting one excellent pair of closed-back headphones before adding open-backs - the ATH-M50x or DT 770 Pro can serve double duty for both tracking and mixing while you save for dedicated mixing headphones.
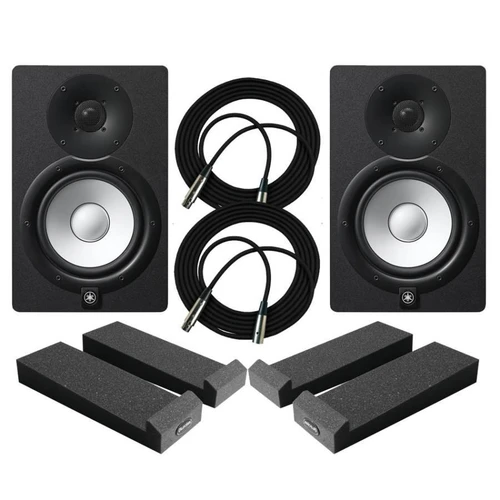
Image: Front End Audio
Acoustic Treatment Costs
Acoustic treatment is the most overlooked line item when people research how much it costs to build a home recording studio, and it is arguably the most impactful upgrade you can make. A $5,000 microphone in an untreated room will sound worse than a $200 microphone in a properly treated space. This is not an exaggeration - room reflections, flutter echoes, and bass buildup can completely mask the quality of your equipment.
What acoustic treatment does: It reduces reflections, flutter echoes, and resonances in your room that color your recordings and deceive your ears during mixing. Without treatment, you are hearing the room more than your speakers, leading to mixing decisions that only sound correct in that specific space. Your mix will sound boomy in one room, thin in another, and professional in none.
DIY treatment ($100 to $400): Build your own absorption panels using rigid fiberglass insulation (Owens Corning 703 or Rockwool Safe’n’Sound), fabric, and wooden frames. Each 2×4 foot panel costs approximately $20 to $35 in materials. Eight to twelve panels treating first reflection points and corners provides meaningful improvement. YouTube has excellent tutorials for DIY acoustic panel construction, and the performance of DIY panels using proper materials matches or exceeds most commercial foam products at a fraction of the cost.
Commercial treatment ($400 to $1,500): Pre-made panels from ATS Acoustics ($35 to $60 each), GIK Acoustics ($99 to $129 each for their Amplitude series), or Auralex ($30 to $80 each). A comprehensive treatment plan for a small room (10×12 feet) typically requires 12 to 20 panels plus bass traps for the corners, totaling $600 to $1,500. GIK Acoustics offers free room analysis and treatment recommendations, which is an invaluable service that helps you spend efficiently.
Professional treatment ($1,500 to $5,000+): Custom-designed treatment from companies like GIK Acoustics (whose FreeStand panels start at $199 and Bass Trap panels at $249) or RealTraps. This includes broadband absorbers, bass traps, diffusers, and potentially a vocal booth or isolation booth. At this level, the treatment is designed specifically for your room’s dimensions and acoustic characteristics, addressing problems that generic panel placement would miss.
Software and DAW Costs
The DAW landscape in 2026 offers more value than ever, with free options that are genuinely capable of professional work and paid options that include enormous libraries of instruments and effects.
Free DAWs: GarageBand (Mac only - surprisingly powerful with quality instruments and effects), BandLab (cross-platform with free cloud storage and unlimited tracks), Audacity (basic but solid recording and editing), and Reaper (technically $60 for personal use, but the trial is fully functional and not time-limited). BandLab in particular has grown significantly, offering a full-featured browser-based and desktop DAW that many creators use as their primary tool.
Mid-range DAWs ($100 to $400): Logic Pro ($200 one-time - Mac only, exceptional value with what many consider the most comprehensive instrument and effects library of any DAW), FL Studio Producer ($199 - includes free lifetime updates, a policy unique among major DAWs), Ableton Live Standard ($349), PreSonus Studio One Professional ($399). Each has distinct strengths: Logic for all-around production, FL Studio for beat-making, Ableton for electronic music and live performance, Studio One for mixing workflow.
Professional DAWs ($400+): Ableton Live Suite ($749), Pro Tools Studio ($299/year subscription or $599 perpetual license), Cubase Pro ($579). Pro Tools remains the industry standard for professional recording studios, but its subscription model and steep learning curve make it less attractive for home studios. Ableton Suite’s comprehensive instrument collection and unique Session View make it the weapon of choice for electronic producers and performing artists.
Plugin costs: Budget $0 to $1,100+ for additional plugins beyond your DAW’s included selection. Many excellent free plugins exist - Tokyo Dawn Labs, Analog Obsession, and Valhalla Super Massive are professional-quality and cost nothing. Premium bundles from FabFilter ($1,069 for the Total Bundle), Soundtoys ($499), and iZotope ($499) provide professional-grade processing that covers every mixing and mastering need. Many producers build their plugin collection gradually over years, buying individual plugins on sale rather than purchasing full bundles at once.
Hidden Costs Most People Forget
When calculating how much it costs to build a home recording studio, these frequently forgotten expenses can add $500 to $2,000 to your total investment.
Cables and adapters: $50 to $200. XLR cables, TRS cables, instrument cables, and various adapters add up quickly. Buy quality cables from brands like Mogami or Hosa - cheap cables introduce noise, develop intermittent connections, and fail at the worst possible times. A good cable lasts decades; a bad cable costs you a retake.
Computer performance: $0 to $2,000+. Music production demands CPU power and RAM. If your current computer struggles with multiple tracks and plugins, you may need to upgrade. 16GB of RAM is the minimum for comfortable production work in 2026; 32GB is recommended for sessions with heavy virtual instruments and plugin chains. Apple’s M-series chips (M2, M3, M4) are exceptionally efficient for audio production, often outperforming more expensive Windows configurations in DAW benchmarks.
External storage: $50 to $200. Audio projects generate large files - a single multitrack session can easily reach several gigabytes. A fast external SSD (at least 1TB) for project storage keeps your main drive clear and provides essential backup. Consider cloud backup services as well - losing an entire project to a drive failure is a mistake you only make once.
Furniture: $100 to $1,500. A proper studio desk with monitor stands integrated or separate desktop monitor stands ($30 to $80 pair) significantly improves your working posture and monitor positioning. Your monitors should be at ear height with tweeters aimed at your ears - desk monitor stands or isolation pads with built-in angle adjustment make this possible.
Power conditioning: $50 to $300. A power conditioner protects your equipment from voltage spikes and reduces electrical noise that can introduce hum into recordings. The Furman M-8×2 ($100) is a popular entry-level option that provides surge protection and EMI/RFI filtering.
Image: Joey Sturgis Tones
Key Takeaways
A functional home recording studio can be built for $500 to $750 with careful purchasing - prioritize a quality audio interface (Focusrite Scarlett 2i2 4th Gen at $180), a reliable microphone (AT2020 at $119 or SM58 at $99), and decent headphones (ATH-M50x at $149).
The $2,000 to $4,500 mid-range tier delivers the biggest quality-per-dollar jump, adding studio monitors (Yamaha HS5 at $400/pair), proper acoustic treatment ($400 to $800), and more versatile microphones like the Rode NT1 5th Gen ($249).
Professional-tier studios ($5,000 to $20,000) compete with commercial facilities, built around premium interfaces (Universal Audio Apollo Twin X from $999), reference microphones (Neumann TLM 103 at $1,300), and comprehensive acoustic treatment from specialists like GIK Acoustics.
Acoustic treatment is the most cost-effective upgrade at any budget level - a treated room improves every recording and every mix you make in it, and DIY panels using proper insulation materials cost as little as $20 to $35 each.
Hidden costs including cables, computer upgrades, furniture, and software plugins can add $500 to $2,000 to your total investment - budget for these from the start to avoid surprises.
Frequently Asked Questions
Can I build a usable home recording studio for under $500?
Yes, but with significant compromises. A Focusrite Scarlett Solo 4th Gen ($130), Audio-Technica AT2020 ($119), Audio-Technica ATH-M20x headphones ($50), an XLR cable ($10), a desk stand ($20), and GarageBand or BandLab (free) comes in under $350. You will be mixing on headphones only, with no acoustic treatment, but this setup can produce clean vocal recordings and serviceable podcast audio. Many successful artists and podcasters started with less. The key is starting - you can always upgrade individual components as your skills and budget grow.
What is the most important piece of equipment to invest in?
If you can only invest in one thing, prioritize the room and acoustic treatment. A well-treated room improves the performance of every other piece of equipment in it. After that, the audio interface is the most critical hardware component because it determines the quality ceiling of your recordings. A great microphone through a mediocre interface will sound mediocre, while a decent microphone through a great interface can sound excellent. The MOTU M2 ($200) and Audient iD14 MkII ($300) punch far above their price class in converter and preamp quality.
Do I need a dedicated room for a home recording studio?
A dedicated room is ideal but not required. Many home studio producers work in bedrooms, closets, or shared spaces. The key considerations are noise isolation (choosing a quiet room away from street noise and household activity), acoustic treatment (which is easier to install permanently in a dedicated space), and consistent setup (having your equipment always ready to use increases productivity). Walk-in closets, while small, actually make decent vocal booths because the clothes provide natural absorption. Just be aware that very small, untreated rooms can create problematic low-frequency buildup that colors your recordings.
Should I buy everything at once or build my studio gradually?
Building gradually is the smarter approach for most people. Start with the essentials - interface, microphone, headphones, and DAW - and begin creating. As you identify what is limiting your work, invest in those specific upgrades. Someone who primarily records vocals may invest heavily in microphones and acoustic treatment before buying MIDI controllers or outboard gear. Someone producing electronic music may prioritize a MIDI controller and plugin library before upgrading their microphone. Let your actual needs guide your purchases rather than buying equipment you may not use. The used market on platforms like Reverb and eBay is also excellent for studio gear - audio equipment holds its quality well, and you can often find professional-grade items at 40 to 60 percent of retail price.
Advertisement
Share
Get the recap
Loved this story? Get more like it.
Join readers who get our weekly entertainment recap - the stories worth your time, delivered every Friday.
No spam. Unsubscribe anytime. By signing up you agree to our Privacy Policy.